Losing files accidentally on your Mac can be stressful and pains not being able to recover it back. To combat these issues recovery tools are readily available such as Disk Drill, using them you can easily recover the lost files and data.
Whether you’re a casual user seeking to retrieve accidentally deleted documents or a professional handling more complex data loss scenarios, Disk Drill proves itself as a robust and accessible data recovery solution for the Mac platform. Read Disk Drill review blog to find out if it is the data recovery software for your Mac.
What is Disk Drill for Mac?

Disk Drill is a robust disk management tool for Mac. You can use it to scan lost data on the disc and recover it on your Mac. It works on both internal and external devices connected to your Mac – iPhones, iPads, iPods, Android devices, memory cards, Kindle, digital cameras. Works to find the lost partitions and prevents data loss. Use the Shredder to safely remove the private documents and make them unretrievable.
Disk Drill Review – The Unbiased Review
Technical Specifications –
| Vendor | CleverFiles |
| Current Version | 4.6 |
| Compatibility | macOS 10.12.6 or later |
| Download link | Click Here |
| Free Version | Yes |
| Price | $39.99 |
| File Size | 63.2 MB |
| Technical support | Via email, live chat |
Disk Drill Features –
Disk Drill provides an extensive list of features for a complete Disk Management Solution for your Mac. Below are a few of the features listed.
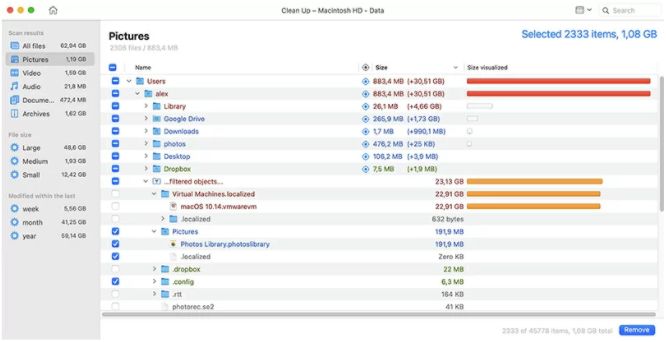
- Provides a Basic Free version for small needs.
- Recovers all file formats and storage types.
- All major Mac devices are supported for both Intel and M1.
- Supports both internal and External drives of Mac.
- Can recover files from USB and Cameras.
- Very simple,easy and quick navigating interface.
- It is cross-platform compatible.
- Deep Scan and data recovery possible for T2 and M1 Macs.
- Supports all macOS versions from 10.5 to the latest.
- Provides free extra tools bundles like Data Protection, Boot Drive, Data Backup, Data Clean up, Data Shredder, Free Space Eraser, Duplicate Finder & more.
How to use Disk Drill ?
Step 1 : Download and Install –
- Open Disk Drill official website to download the latest version or the version compatible with your macOS. Click on the Free Download icon to download the app onto your Mac.
- It will automatically download a file of size 84.9 MB of the selected version to the desired download location on your mic.
- Go to the Downloads folder on your Mac and double-click on the Disk Drill disk image file downloaded.
- It will open a new Window, you need to simply drag the Disk Drill App icon into the Applications Folder icon. That’s it Disk Drill App is installed on your Mac.

Step 2 : Launch Disk Drill App –
- You can launch the Disk Drill App on your Mac from the Applications folder by double clicking on the App Icon.When prompted, if you want to open it, Click on Open button.
- Once the App is open, you will be directed toward a bunch of options to be enabled.
- Enable Recovery Vault – Helps with finding deleted files in future
- Monitor Disks for Hardware Issues – The S.M.A.R.T status is a free monitoring system built in Disk Drill.
- Mount Scanning Results as Disk – Simplifies the file recovery process, allowing to identify lost files as from external drives.
- Disk Drill Tour – Quick and simple tour of Disk Drill app.
- Enable all the options you like and then Click on Continue button. You can also activate the above options later also.
- When prompted to login, proceed with login so that Disk Drill is given permission to access Mac’s disks.
Step 3 : Checks to proceed –
After installation is done, you need to do below checks before proceeding to scan and recover.
- Check if Disk Drill is properly installed, by going into Application Folders and scroll to find Disk Drill App Icon visible.
- Connect the devices you wish to recover the lost data from to your Mac. These external devices such as USB or Camera.
- Quit all other currently running applications on your MAc, specifically applications which are accessing the disk you wish to recover data from.
- If you wish to recover data from Your Mac internal hard drive, then you need to shutdown your Mac and try to recover the data from another Mac using Target Disc Mode.
- Check if Recovery Vault and Guaranteed Recovery is enabled on Disk Drill App after installation.
Step 4 : Begin to Scan drives –
- On the main screen of Disk Drill you will find all that can be scanned,
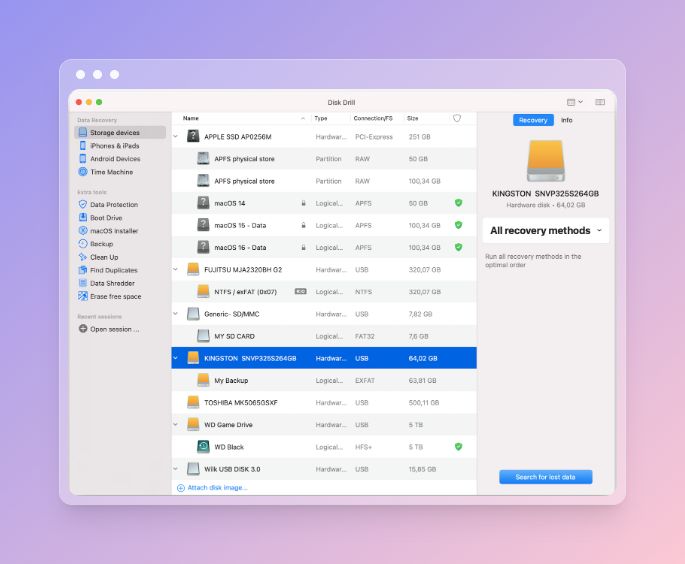
- In case you are unable to view your device, check the Grid icon and go with the ‘Show hidden items’ option.

- Here you need to select the drive from where you need to recover deleted files. Partitions will also appear here with different names which are easy to identify.
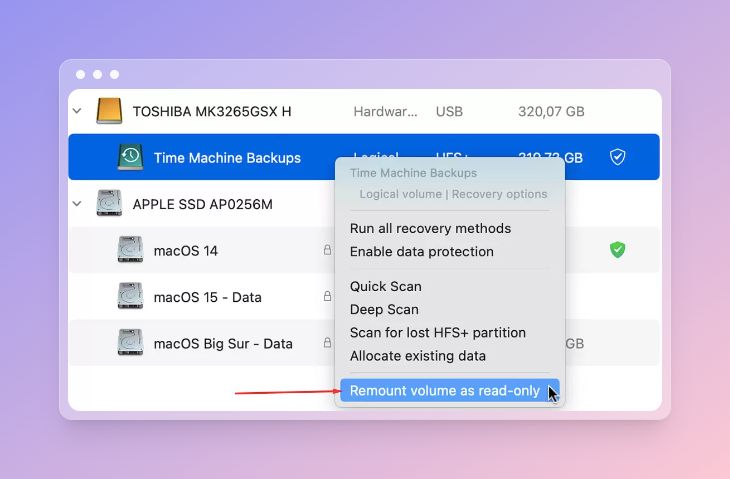
- Even before the scan starts, Disk Drill will see if a padlock icon appears in the read-only mode. It is to make sure the recovery process isn’t interrupted by other apps interference.
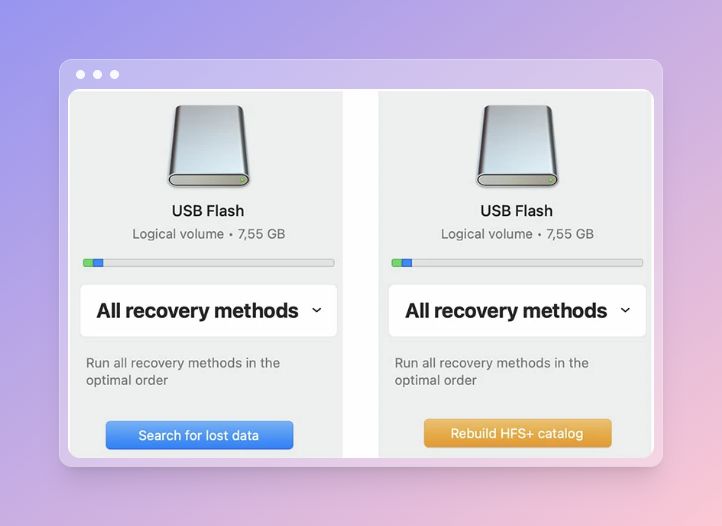
- Click on the ‘Search for lost data’ button after selecting the partition. In case of recovering from HFS+ catalog and a corrupted files is found, the colour will change to yellow and option appears to be ‘Rebuild HFS+ catalog’.
- Wait till the scanning is completed by Disk Drill, depending on the size of the hard drive it might take hours.
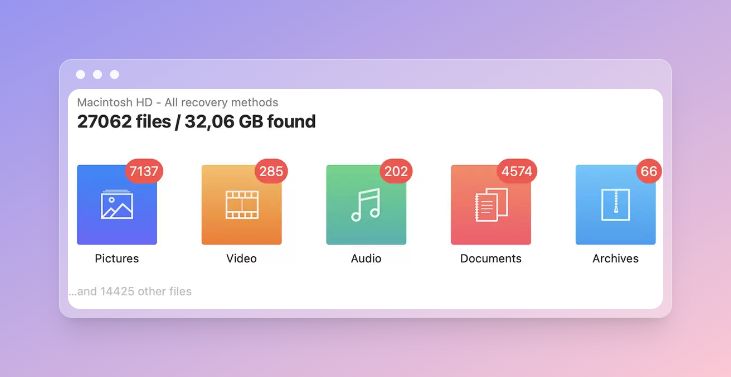
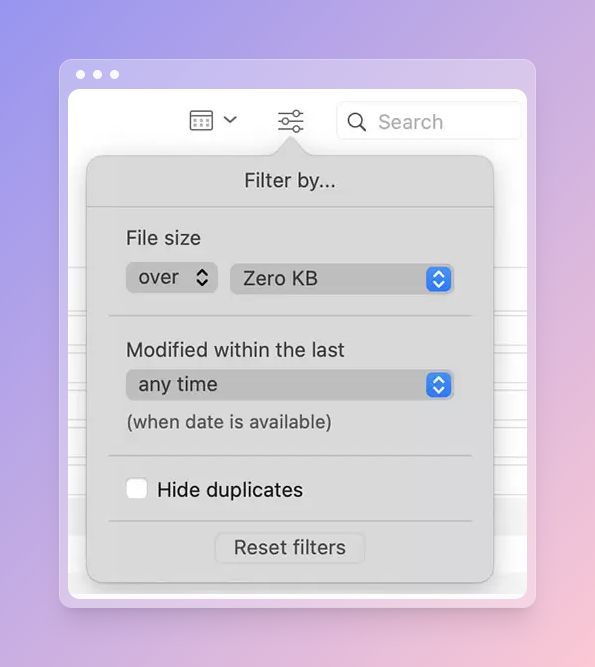
- You can also filter the scanned results by keyword, file type, file size and date.
Step 5 : Select Files from Preview –
- Once scanning is completed , you can preview all the files which can be actually recoverable. Disk Drill provides 3 preview options to decide which files you want to recover.
- See the enlarged preview with the mouse above a file from the list.
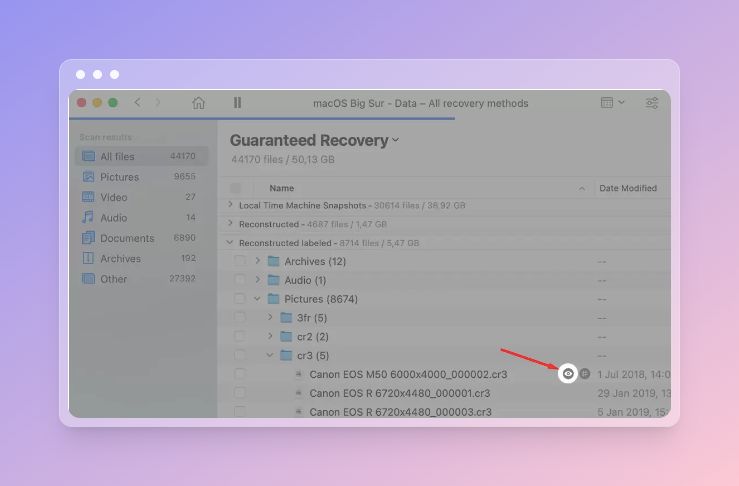
- From the results, click on the file to view for details in the Preview on the right side of the application.

- A Hex View lets you see the binary code of the files.
- After checking the preview of the files you can select the ones which seem to be in good condition to recover without being corrupted.
- Click on the recover all or recover the selected files from the bottom when the scanning is completed.
Disk Drill Pros & Cons –
| Pros | Cons |
| Complete Disk Management Solution Utility. | Limitations with Free Version |
| Cross platform compatible | Expensive |
| Both Intel and M1 devices compatible | |
| Supports Internal and External drives | |
| Most file formats and storage types are supported to recover | |
| Free extras like byte-to-byte backups,Disk Clean up, Duplicate Finder etc etc | |
| Supports on USB’s, Camera storage, SD Card etc | |
| All macOS versions supported | |
| Technical support via email and live chat |
Frequently Asked Questions –
Q1. Is Disk Drill safe for Mac?
Yes, Disk Drill is a relatively safe product for Mac. It is updated regularly with both security and features constantly to keep it safe.
Q2. Is Disk Drill any good?
Disk Drill is an excellent data recovery software, which supports both internal and external drives to recover lost data easily. It is a cross-platform application that works on both Mac and Windows. Basic free version comes with limited features, but Pro version uses much deeper scan and recovery for extensive usage.
Q3. Is Disk Drill free for Mac?
Yes, Disk Drill comes with a Free version with limited features for basic usage. You can purchase Pro Version for more features and comprehensive recovery capabilities.
Q4. Is Disk Drill completely free?
Yes Disk Drill provides a completely free version for both Mac and Windows. Although the free version supports limited features and usage limitations, it is more than enough for basic file recovery usage.
Conclusion On Disk Drill review
In conclusion, Disk Drill for Mac proves to be a best data recovery solution, offering a blend of user-friendly design and powerful functionalities. Its versatility in handling various data loss scenarios, coupled with an intuitive interface, makes it accessible to users of all expertise levels.
We hope this Disk Drill review covers all points on this powerful Mac data recovery application. Is Disk Drill worth it? Yes it is great data recovery software for Mac with a number of other useful features to perform multiple functions. It works well with the T2 and M1 chips alike and comes prepared to be downloaded for macOS Monterey. Try it now!!
Also Read


